Note for other bloggers: Don't insert images via a link as the image can become broken.
This third week was planned to be a week to practice my newly learned skills. As such, I made a number of arrowheads, but I also simply practiced flintknapping on some junk pieces. Each arrowhead will be discussed below along with some other information. Like the last post, this one may be long, but that's mainly because I have two weeks of flintknapping to cover. Once again, donations of materials are welcome! Thank you, Kaden, for your donation of glass bottles!
I realize it slipped my mind to cover safety in the previous post. Perhaps that was for the best, though, as that post was almost too long. The large leather patch is tied around your thigh. It provides a solid place to pressure flake on, and it will prevent your thigh from getting sliced up. The smaller leather patches are used to cover your palm. A video demonstration of their use is seen on my first post. You can flintknap on your hand or your thigh depending on what's easier and more comfortable. Gloves are of course meant to protect your hands. You could cut yourself with the flakes, the arrowhead, or gouge your hand with the pressure flaker if you aren't too careful. A few thin flakes have gotten lodged in the gloves, which is better than my hand. I wear glasses, so I won't be using the goggles shown, but some sort of eye protection should definitely be worn. Flakes do fly, and a flake in the eye would be very painful and dangerous.
I am going to go over some of the practice I did to start even though most of it was done after the first arrowhead down below. My father had a bunch of old Old Spice bottles he had been saving for flintknapping, so he broke them up so I could use the bottom of them. They have a sort of ivory color to them, and I like their color better than the plate's color. I decided to include a picture of one since many people probably have never seen one of these old bottles. My father also mentioned that Clorox used to come in brown jugs and that the bottom of the jug was very useful material for an arrowhead.
I decided to save the good pieces of glass for arrowheads and use the pieces that were curved like the side of the bottle or frilly like the plate for practice. While doing this, I realized what I was doing wrong. To pressure flake, you push the pressure flaker both down and into the material. I wasn't applying enough pressure inwards, so the flakes I created would not travel far. I know what I am doing wrong now, but I still need to practice.
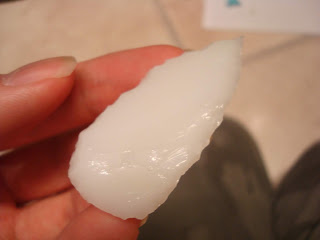
On the left, you see a piece of an Old Spice bottle with a conchoidal fracture on it. Note the visible lines. I don't know why they occur, but it might be due to the force traveling through the material as a wave. The right picture is of a flake I created while practicing. It's about an inch long and a quarter of an inch wide. It is the perfect flake. If I am able to consistently make flakes like that, I will be able to create beautiful arrowheads. So far, I have been able to get flakes similar to it, but they were smaller and broke in half, so I can't show them. I don't expect to be able to create flakes like the one above consistently even after the next month or so of flintknapping. Clicking each image should redirect you to a larger picture.
This was my first arrowhead of the week. It was made from the bottom of one of the aforementioned Old Spice bottles. As you can see, I had a number of problems to work around. First of all, there was the lettering. If I failed to clean up the flat portions of the glass, then it would be very obvious. The other issue is the hole I had to work around. Luckily, I was able to completely avoid it due to the shape of the arrowhead I chose. Unfortunately, the Old Spice bottle bottoms are curved. This makes it harder for me to flintknap as I fear I could break the arrowhead if I apply to much pressure. This, in turn, leads to an arrowhead that could be made thinner and cleaner. There are still some flat portions on the other side.
This arrowhead was made from the plate. I was simply practicing on a junk piece, but as I was working at it, I saw a shape begin to form. This was the result. I don't know if it would be useful as an arrowhead, but it looks rather neat. Due to the nature of the junk piece, the arrowhead was thicker in the middle. I managed to remove nearly all of the flat portions from the glass.
The problems I came across with this arrowhead are the same as above. I planned a bit better, though, and made the arrowhead wider so I would not have to fear snapping it in half and losing two hours of work. I don't know if I will do these external notches again as they can break off or chip. They also require a piece of glass that is much wider than the finished arrowhead. This means a lot more work is needed to get the proper shape roughed out.
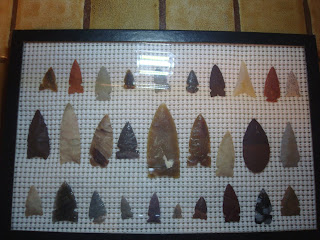
On my previous post, Kyle asked about why some arrowheads are notched differently. I wasn't able to give a good answer, so I asked my father. He said that part of the reason had to do with its use. Arrowheads with side notches, like the third arrowhead, would most likely be used as actual arrowheads. Others with a sort of stem, like the fifth one, may have been used as spear points. He also said that it was partly due to what the creator thought an arrowhead was. Different tribes would have developed different notching techniques and then continued using them for centuries. Some of the different notching styles may be due to experimentation. Perhaps the flared notches on the sixth one would stick in a deer better. My father knows an archaeologist at the BLM, so if you have any other questions, ask away. I may be able to get an answer from an expert.
This week was mainly meant for practicing my newly learned skills, and I certainly did that. I realized my mistakes and were able to correct them. I also was sure to use the abraders much more as I mentioned in the previous post. It won't be too difficult to improve. I simply need to practice more to get better. On a side note, I believe I took much better pictures this time, or a least my legs weren't in them. The yellow envelope provides a decent background.
So far, I am on schedule as I was sure to give myself plenty of time to practice. Therefore, keeping up with my schedule hasn't been too difficult. Besides that, I have been working at my arrowheads quite a bit, so that helps to keep me on track. I plan to make some arrowheads from some cooler pieces of glass next week, so be sure to read the next post to see them. I've been eyeing a piece of clear glass for a spear point. There is also a red-orange and sparkly purple piece that will make great looking arrowheads. After that, I plan to start working on stone arrowheads. Whether or not I do, though, depends on whether or not I am ready.


