I ended last week's blog by stating that I would be moving onto stone this week and perform some heat-treating. I did just that this week and made four stone arrowheads, two glass arrowheads, and returned to an earlier piece. Sorry if my blog is a little disorganized. I didn't realize this was a two-week period and had nearly completed my blog when it was brought to my attention. As such, I had to add some new material from the extra week, and the whole post may read like two weeks were combined.

These are some agates my father has. They were once my grandfather's, and he used them in jewelry and belt buckles. The pink stone is novaculite. These stones can be used as they are for flintknapping, but they would be very hard to work. What heat-treating does is make the stone easier to work by melting the micro-crystals together into crypto-crystals, which are smaller. The reason why glass is easy to work is because it is amorphous, or lacks a crystalline structure. Rocks with a crystalline structure can be used in flintknapping, but it is best to heat-treat the rocks beforehand so the crystals are as fine as possible.


To heat-treat, we buried the agates and novaculite in the sand. We set the oven to three hundred fifty degrees and baked the stones for eight hours. After the eight hours, we turned off the oven and let them cool overnight. I will see and talk about the result of the heat-treating process next week. We used our oven for heat-treating, but the native peoples would have used the coals of a campfire.

Similar to last week, I made a total of five arrowheads for the first half of the two-week period. The three dark-gray ones are made of non-volcanic glass. A more proper name for them, though, is porcellanite, and it forms when coal seams burn and melt the surrounding rock. If the surrounding rock has the proper composition of quartz and cools correctly, non-volcanic glass forms. As such, it wasn't too difficult to work with and most of the problems I encountered with the glass were present with the stone.

This was the form of the porcellanite before I started to work it. My father had purchased stones already cut for flintknapping, so I guess I will still have to deal with those flat sections and driving the flakes across the face. The pink stones are novaculite. I, however, didn't use them as they were way too difficult to work, even after heat-treating. I could not even get a sub-par flake to form on them.

This was the first one of the week. I started by breaking the above piece of stone in two so I wouldn't waste the whole slab. It has a rather odd shape because the stone broke badly half way in. I decided to continue with the piece instead of trashing it and got this. The stone required a bit more pressure to work, but it was not that much harder than glass. The arrowhead could be cleaned up a bit, but I didn't want to break it even more.

I used the bottom of the other glass bottle Kaden donated for this arrowhead. I had some extra time and decided to use it for this. It isn't really that clean of an arrowhead as I wasn't trying too hard with it. Otherwise, nothing too eventful occurred with this arrowhead.
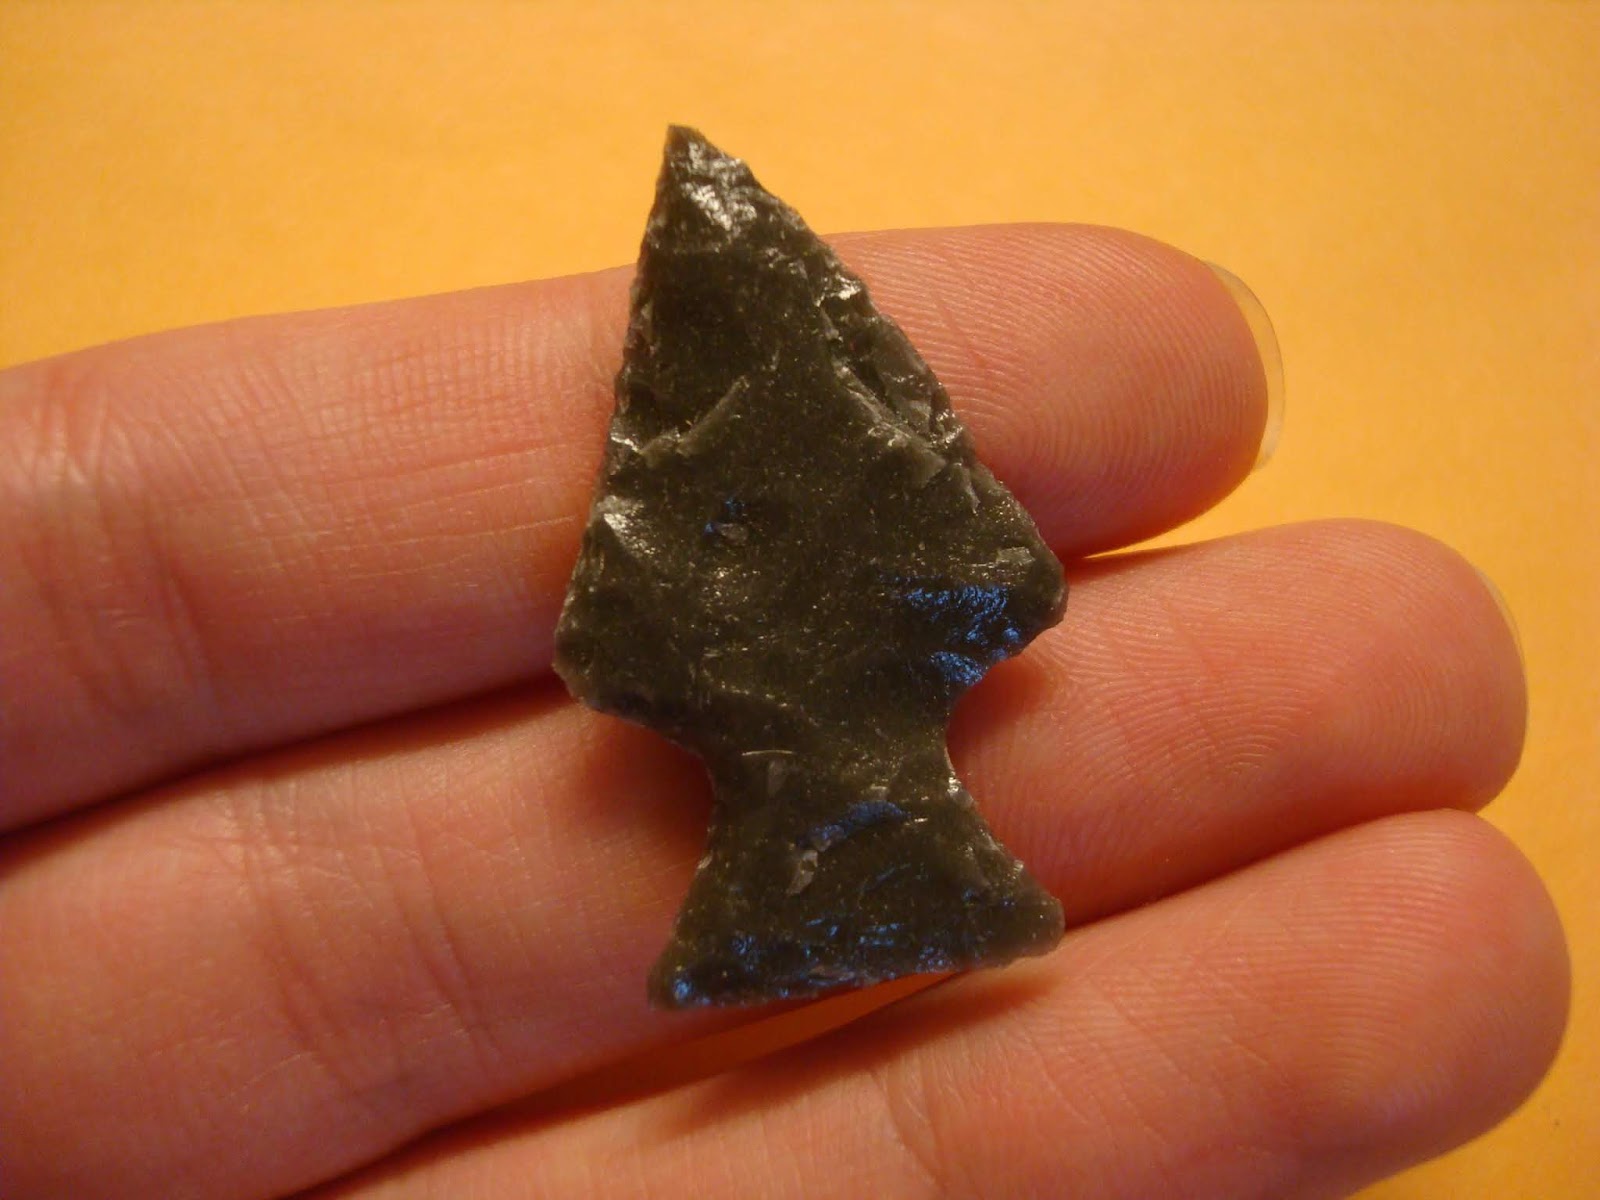
The third arrowhead was made from the other half of the porcellanite slab. The reason it has such a pronounced stem is because I removed a flake that was way too large. I could have reduced the size of the arrowhead or simply mirror the mistake and use it in the notching. I choose the latter, and it turned out okay. I do not like how it is not symmetrical, though. I feared I could snap it in twain, so the work needed to make it symmetrical was not done.


This was not a new arrowhead but rather an older one I cleaned up. The picture on the left shows how the arrowhead use to look and the one on the right shows the improved version. The image quality also improved. It was my third arrowhead and probably my worst. A section of the plate was used to make a teardrop-shaped arrowhead, but I was not skilled enough to make anything of value. I returned to it this week, just like I said I would, and managed to make it look much better. There are still the large flat sections, but the edge is much more even.

My final arrowhead of the week was this guy. Most of the same problems occur over and over again, so it is kind of getting harder to talk about each arrowhead without repeating myself. Anyhow, this arrowhead was made from a portion of a porcellanite slab and has the weird shape due to a bad break. I decided to go for this shape instead of reducing the arrowhead's size even further.

These three arrowheads were made for the second half of the two-week period. The gray ones are the porcellanite, or non-volcanic glass, and the brown one is the bottom of a beer bottle.

Nothing too exciting happened with this piece. The only thing of note is that this was from a porcellanite slab that I able to get three arrowheads from. I hope to be able to get multiple arrowheads from the agate slabs.


As mentioned above, this came from a beer bottle bottom. I had three bottles to work with, but only managed to make one arrowhead as the other bottles didn't want to work with me. I started by scoring about the bottom of the bottle and striking it with a mallet. The bottom itself was not exactly curved but rather composed of three straight sections as seen in the graphic. The circled section was flat enough and thick enough that an arrowhead could be made. There still is a slight curvature to the arrowhead, though.

This was my final arrowhead of the week and probably my worst. Whereas I was able to remove the flat sections from all the other arrowheads, was unable to do so with this one. The reason why was because I kept reducing the size to get the shape I wanted. However, the best flaking can only be performed on the unworked edge of an arrowhead. Once the edge has been worked numerous times, the flakes start to become short and thick. If you look closely on the image, you can see a sort of boundary line on the right side. I reduced the arrowhead by working at that side, but my flakes couldn't travel all the way across, resulting in a weird look. This is also why many of the arrowheads I have made are smaller than I would like. I can not get the flakes to travel as far as I want, so I try not to make any large arrowhead that will not turn out like I want. Ultimately, I need to start with smaller pieces in order to get the best arrowheads I can.
Overall, this week was meant for me to start working on stone. I did just that but also got some more practice in on some glass arrowheads. I am on schedule and hope to use next week to practice more with stone arrowheads. I believe I am on schedule because I have given myself a reasonable amount of time to learn the skills and because I have been working hard to learn those skills. I should be making a few from the agates, so be sure to view my next blog to see them.
My blog was shorter than I would have liked, and I apologize if it was a bit disorganized, but I will have something neat next week to make up for it.
These look awesome Brandon! I think that I would personally struggle a lot with the patience required in this process. You said that your dad purchased the porcelain slab. Where would you purchase something like that. Is there a certain size that your arrowhead must be or is it up to you?
ReplyDeleteI believe he purchased them online, but perhaps you could get them from a specialty store. Certain styles of arrowheads have a general size they come in, but I have been mainly just making what I want.
DeleteThose arrowheads are all so beautiful! Would you consider what you are doing to be art? I definitely would. I love that you are able to make them from recycled materials like beer bottle bottoms. What material is the easiest for you to work with? Is there a particular material you wish you could work with, but are unable to? I hope you bring all your finished arrowheads to class sometime as I would love to look at them in person!
ReplyDeleteI did see a few art pieces in the Overstreet Arrowhead Price Guide. One was a bear. Something like that could be very cool to make if I can get the right piece.
DeleteSo far, glass has been the easiest to work with. I wish I had some other colors of glass. My father has a large green glass arrowhead. I think a blue glass arrowhead would be nice.
I do plan on bringing them to class for the TED Talk. My father is thinking it would be good to put them in a frame like he has his in.
Nice work on those arrowheads Brandon. I think it would be neat if for your last blog you uploaded a video of you using them. Perhaps Mr. Kelly would let you make a bow in wood shop that you could use to prove the hardiness of your arrowheads. Just throwing it out there (maybe making a spear would be easier, idk).
ReplyDeleteSo far, they have not been all that sharp, but that matters little when they are flying through the air at hundred feet per second.
DeleteMy father actually made some arrows using his arrowheads for our Arrow of Light award for the Cub Scouts. It would be cool to make, but require some different skills.